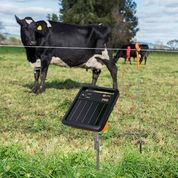
How to test your electric fence - 202313 September 2023 | Beth
Testing your electric fence is important to ensure it's functioning properly and providing the intended level of security or containment. Here's how you can test your electric fence: Tools you will need:
Steps:
Always exercise caution when working with electric fences, and follow safety guidelines to avoid electrical shocks. If you are unsure about any aspect of your electric fence system or encounter issues you can't resolve, it's advisable to consult with a professional electric fence technician. There is a HUGE variety of electric fence testers. In general, if you only have a small fence then just go for a cheaper option - with the spike that goes into the ground and the clip on the fence. These start at around £12.50. Beware that you sometimes need to shield the lights so you can see the reading in bright sunlight. These 'starter' testers are handy because you can test both the fence and the energiser with them. You even more sophisticated 'fault finders' that not only tell you the reading but also help you identify exactly where it is on the fence. But these more advanced testers can get more expensive than your energiser if you're not careful! The little pocket testers that you just point at the fence are quick and easy (Hotline does a good one called their Hotline Beeper tester), although they do not allow you to test your energiser independently so become less helpful should a problem arise and you need to isolate the cause of the issue. Click HERE to look at our electric fence testers! If the fault is with your energiser, and you have checked your power supply, then double check the wires that go on to the fence - you may not see a break but these wires can get tugged and are often the source of the problem. If the problem is the energiser itself and it is not under warranty, then it is possible to fix more expensive energisers - usually for about £60 +. For the less expensive energisers unfortunately it is not usually cost effective to have them repaired so you may need to consider a new one. Click HERE to see our energisers! Tape and rope will deteriorate over time. It may not appear broken, but the metal wires within the tape/rope can snap and even just a couple of little breaks can stop your fence working properly. Please do not tie knots if it breaks because this will not allow the electricity to run around the fence properly. You will need to replace your tape/rope from time to time. Some tape and rope comes with a UV stabiliser that will make it last longer. And some is just made of stronger material. All our tape and rope is made in Irelands and is fantastic quality compared to some cheap imports used by many. Click HERE to see our electric tape and electric rope! If you have any questions about electric fences, please email sales@farmcareuk.com We are a family run business and we are happy to help. www.FarmCareUK.com |
|


 Basket |